WHAT ARE COVER CROPS?
Cover crops are fast-growing legumes and non-legumes that are planted for the purpose of improving soil quality and nutrition, and/or for attracting beneficial insects.
Often referred to as a “green manure” crop, it is planted in the fall after harvest and tilled under in the spring. Examples include: red clover, hairy vetch, oats, buckwheat, forage rye, Italian rye grass (sown by October), field beans and forage pea (sown by November). Cover crops literally make a living “cover” to sustain soil life until spring planting.
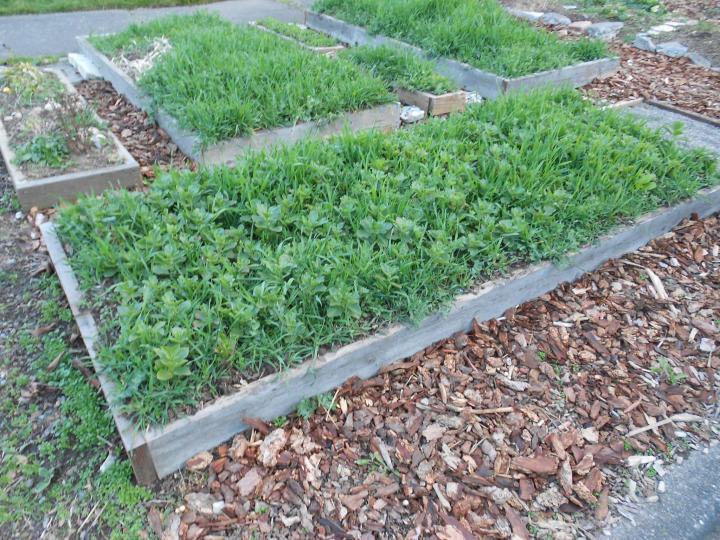
Image: Cover crops mix on raised garden beds. Credit: WSU.edu
BENEFITS OF COVER CROPS
Imagine this: While you and your garden rest over the wintertime, you have a garden helper which is working hard to improve your soil! Cover crops protect existing soil, contribute organic material and nutrients to feed your soil, and keep your soil alive year-round to ensure healthy soil structure.
The numerous benefits of cover crops include:
- Keeping soil from blowing or washing away. When you remove plants, you remove nature’s way of protecting the landscape and its fertility.
- Increasing organic matter and nutrients
- Increasing earthworms and beneficial microorganisms
- Decreasing compaction and improving water, root, and air penetration of soil
- Providing habitat and food (nectar, pollen) for beneficial insects and late-season pollinators
- Creating an aesthetic addition to your garden during winter dormancy
An added benefit of raising cover crops is that the foliage and root growth can be tilled under in late winter to help loosen heavy soils and improve overall soil structure and fertility.
Cover crops may be used in any size garden—from a 4’x4’ raised bed to a large farm or open field.
WHEN DO YOU PLANT COVER CROPS?
Plant in the late summer or early fall (after harvest) in Canada and northern parts of the United States, and any time after the harvest in the southern United States.
In most regions, it’s best to plant right after harvest. The cover crops need 4 weeks before a fall frost to get established. Buckwheat can be planted earlier in areas that have already have been harvested. In the spring, you pull, cut, or till under the cover crops.

Image: Cover crop of buckwheat in a field. Credit: Pixabay.
WHICH COVER CROP SHOULD I PLANT?
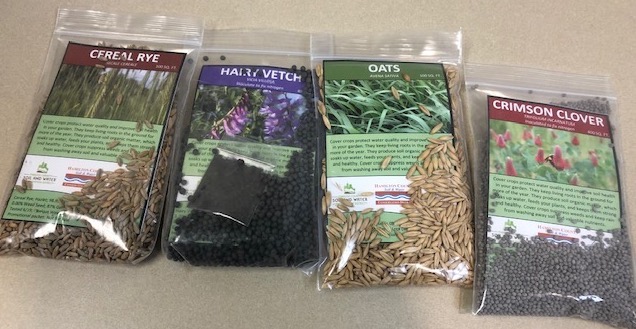
These four cover crops are among the most commonly available through garden centers and mail-order catalogs:
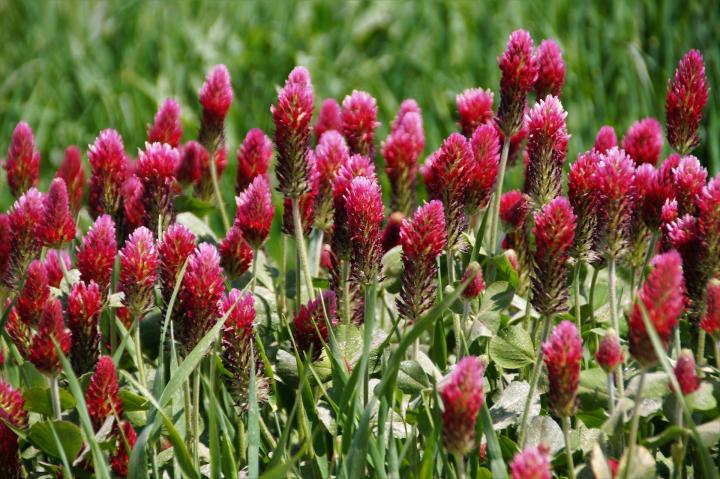
- Red or crimson clover (Trifolium incarnatum) is an ideal cover crop to sow in the late summer or fall and turned in in the spring in zones 6 and higher. Used as a summer legume in colder areas where it will usually winterkill. Allow it to flower and the bees will love you.
- Hairy Vetch (Vicia villosa), a legume, is used as a cover crop to restore nitrogen to the soil for healthier plants. It grows in zones 1 to 5, and can be planted in the spring, or the fall.
- Winter Rye (Secale cereale) is an excellent winter field cover crop because it rapidly produces a ground cover that holds soil in place against the forces of wind and water. Rye’s deep roots help prevent compaction and, because its roots are quite extensive, winter rye also has a positive effect on soil tilth. Annual in zones 3 to 11.
- Buckwheat grows very quickly, making it a favorite “quick fix” among gardeners. It is known to grow much better in low-fertility soils. Great for suppressing weeds.
The choice of cover crop depends on the main benefit you are hoping to obtain from the cover crop.
- A primary benefit in a garden is the addition of nitrogen, in which case legumes would be used. Legumes work in harmony with bacteria that lives on their roots. These bacteria take nitrogen from the air and fix it in pink root nodules, adding nitrogen to the soil in a form that plants can absorb.
- If you are most interested, however, in building organic matter, use oats or barley or a cereal, but remember that their incorporation will make nitrogen in the soil temporarily unavailable to the succeeding crop unless extra nitrogen is added.
- For both nitrogen and organic matter, use a mixture of legumes and cereals.
Many cover crops sold in the market are indeed mixes with at least one grass and one legume species. For example:
- Rye (grass) and crimson clover (legume),
- Hairy vetch (legume) and oats (non-legume)
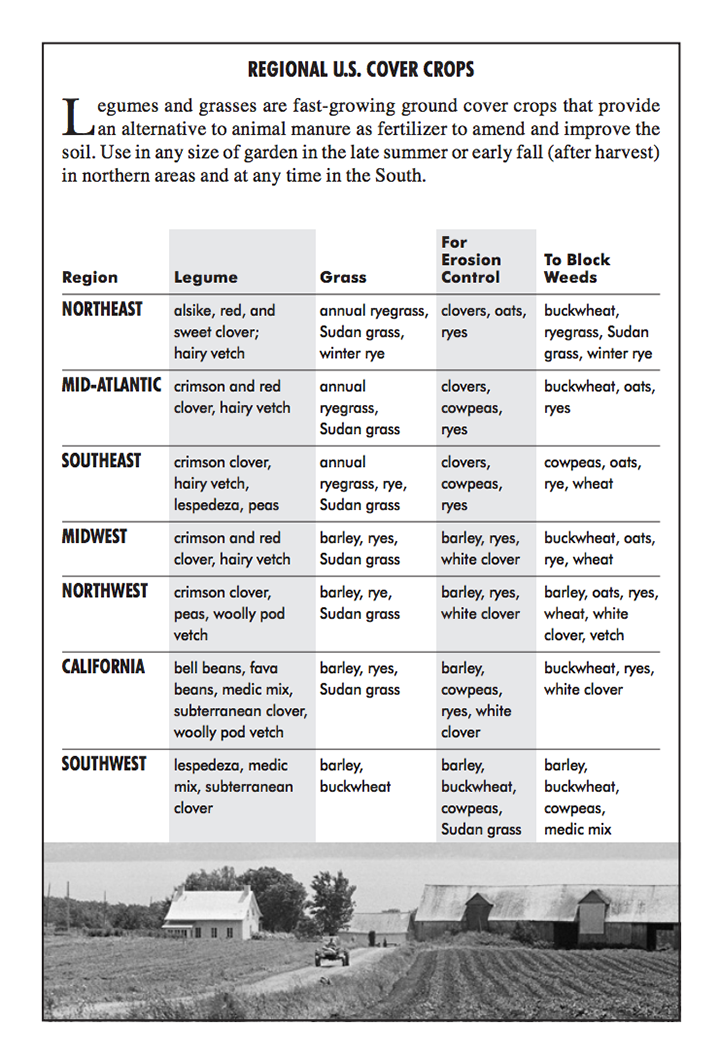
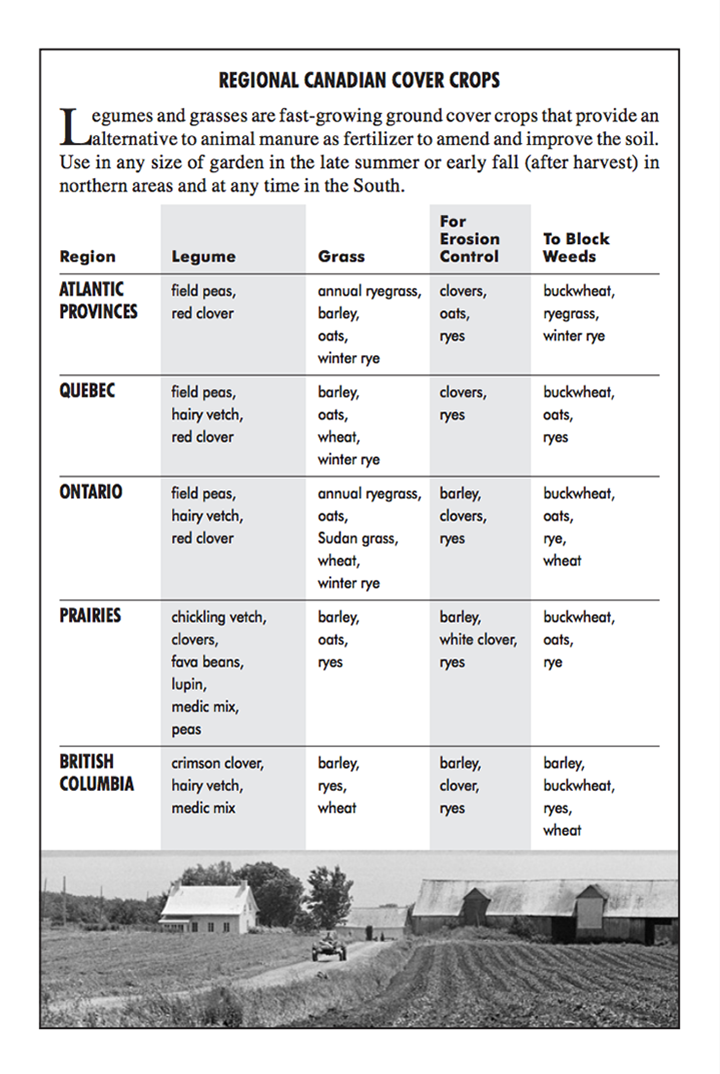
COVER CROPS FOR YOUR REGION
Of course, cover crops differ by gardening zone and region. Consult the charts below. (Click on either chart to see a larger, downloadable pdf version.)
HOW TO PLANT COVER CROPS
Just scatter the seed over the area to be covered at a depth corresponding to the size of the seed. Large seeds should be covered with one-fourth to one-half inch of soil or compost. Small seeds can be left on the surface and lightly raked. Apply a thin layer of loose straw to protect the area from wind and runoff from heavy rains.
The amount of seed to plant will vary with the species, but, in general, winter cover crops are seeded at a rate of 2 to 3 pounds per 1,000 square feet.
Note on Inoculating Legume Seeds: If you are planting legumes as a nitrogen fixes, you also need to purchase “inoculant.” Use at a rate of at least 1 oz. per 10 lbs. of seed. To help the inoculant adhere to the seed, mix 9 parts hot water (nonchlorinated) with 1 part corn syrup (10% solution), let cool, and add a small amount of this solution to the seeds.
Fertilizing is generally not necessary, especially for established garden beds.
As mentioned above, some members of the legume family of plants (example: hairy vetch) actually facilitate the fixing of nitrogen into the soil, doing your fertilizing for you.Following tilling, the cover crop will decompose, and soil microbes will return nitrogen and other elements to the soil for the next crop. It is best to cut the cover crop in small pieces (i.e., shred), so it will break down faster. (For plants that have a large volume of top growth that tends to get tangled in the tiller tines, mow the tops first, then till under.)
Once the cover crop is shredded, it is important to till the cover crop into the soil as quickly as possible. The cover crop will lose nitrogen and carbon very rapidly if left exposed in the sun. The breakdown process will take 2 to 3 weeks.
Source / The Old Farmer’s Almanac