Composting Benefits
Soil Conditioner
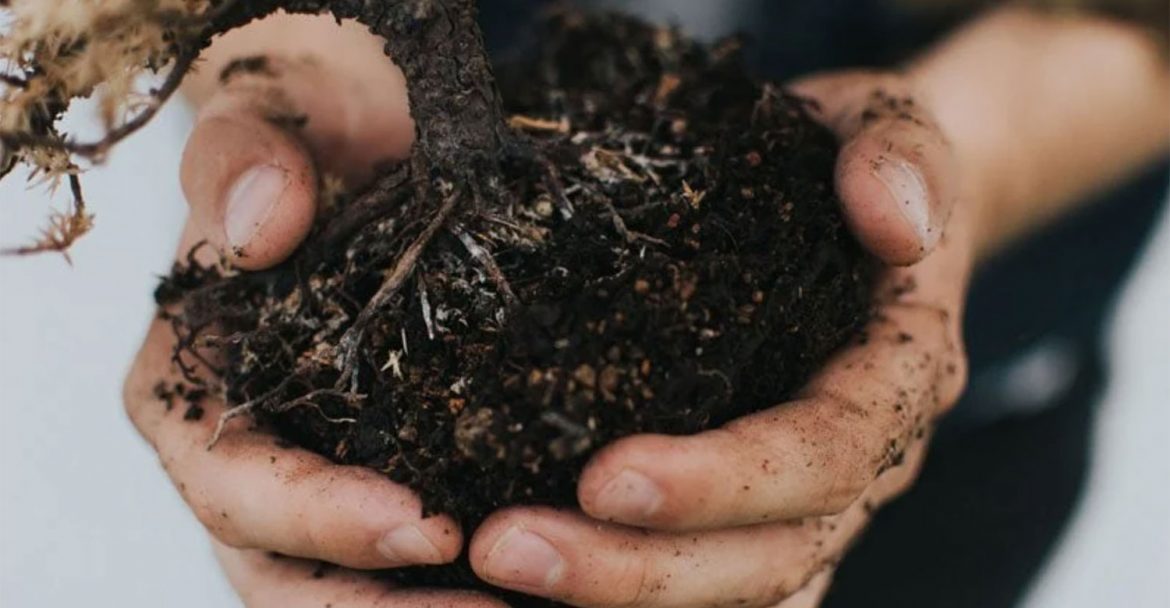
With compost, you are creating rich humus for your lawn and garden. This adds nutrients to your plants and helps retain soil moisture. They don’t call it “black gold” for nothing.
Compost is the single most important supplement you can give your garden.
Recycles Kitchen and Yard Waste
Composting can divert as much as 30% of household waste away from the garbage can. That’s important because when organic matter hits the landfill, it lacks the air it needs to decompose quickly. Instead, it creates harmful methane gas as it breaks down, increasing the rate of global warming and climate change.
Introduces Beneficial Organisms to the Soil
Microscopic organisms in compost help aerate the soil, break down organic materials for plant use, and ward off plant disease.
Good for the Environment
Composting offers a natural alternative to chemical fertilizers when applied to lawns and garden beds.
Reduces Landfill Waste
Most landfills in North America are quickly filling up; many have already closed down. One-third of landfill waste is made up of compostable materials. Diverting this waste from the landfill means that our landfills will last longer (and so will our wild spaces).
What to Compost
What you can put into your compost will depend somewhat on what kind of composter you have, but some general rules do apply. All compostable materials are either carbon or nitrogen-based, to varying degrees. The secret to a healthy compost pile is to maintain a working balance between these two elements.
The Secret to a Healthy Compost Pile: Carbon/Nitrogen Ratio
Carbon
Carbon-rich matter (like branches, stems, dried leaves, peels, bits of wood, bark dust or sawdust pellets, shredded brown paper bags, corn stalks, coffee filters, coffee grounds, conifer needles, egg shells, straw, peat moss, wood ash) gives compost its light, fluffy body.
A healthy compost pile should have much more carbon than nitrogen.
Nitrogen
Nitrogen or protein-rich matter (manures, food scraps, green lawn clippings, kitchen waste, and green leaves) provides raw materials for making enzymes.
A healthy compost pile should have much more carbon than nitrogen. A simple rule of thumb is to use one-third green and two-thirds brown materials. The bulkiness of the brown materials allows oxygen to penetrate and nourish the organisms that reside there. Too much nitrogen makes for a dense, smelly, slowly decomposing anaerobic mass. Good composting hygiene means covering fresh nitrogen-rich material, which can release odors if exposed to open air, with carbon-rich material, which often exudes a fresh, wonderful smell. If in doubt, add more carbon!
This table details how the items in your compost are likely to be classified:
| Material | Carbon/Nitrogen | Information |
|---|---|---|
| Wood chips / pellets | Carbon | High carbon levels; use sparingly |
| Wood ash | Carbon | Only use ash from clean materials; sprinkle lightly |
| Tea leaves | Nitrogen | Loose or in bags |
| Table Scraps | Nitrogen | Add with dry carbon items |
| Straw or hay | Carbon | Straw is best; hay (with seeds) is less ideal |
| Shrub prunings | Carbon | Woody prunings are slow to break down |
| Shredded paper | Carbon | Avoid using glossy paper and colored inks |
| Seaweed and kelp | Nitrogen | Apply in thin layers; good source for trace minerals |
| Sawdust pellets | Carbon | High carbon levels; add in layers to avoid clumping |
| Pine needles | Carbon | Acidic; use in moderate amounts |
| Newspaper | Carbon | Avoid using glossy paper and colored inks |
| Leaves | Carbon | Leaves break down faster when shredded |
| Lawn & garden weeds | Nitrogen | Only use weeds which have not gone to seed |
| Green comfrey leaves | Nitrogen | Excellent compost ‘activator’ |
| Grass clippings | Nitrogen | Add in thin layers so they don’t mat into clumps |
| Garden plants | — | Use disease-free plants only |
| Fruit and vegetable scraps | Nitrogen | Add with dry carbon items |
| Flowers, cuttings | Nitrogen | Chop up any long woody stems |
| Eggshells | Neutral | Best when crushed |
| Dryer lint | Carbon | Best if from natural fibers |
| Corn cobs, stalks | Carbon | Slow to decompose; best if chopped up |
| Coffee grounds | Nitrogen | Filters may also be included |
| Chicken manure | Nitrogen | Excellent compost ‘activator’ |
| Cardboard | Carbon | Shred material to avoid matting |
Is There Anything I Definitely Shouldn’t Put in My Compost?
- Do not compost meat, bones, or fish scraps (they will attract pests) unless you are using a composter designed specifically for this purpose. The Green Cone Solar Waste Digester is one good example.
- Avoid composting perennial weeds or diseased plants, since you might spread weed seeds or diseases when spreading your compost.
- Don’t include pet manures in compost that will be used on food crops.
- Banana peels, peach peels, and orange rinds may contain pesticide residues and should be kept out of the compost.
- Black walnut leaves should not be composted.
- Sawdust may be added to the compost, but should be mixed or scattered thinly to avoid clumping. Be sure sawdust is clean, with no machine oil or chain oil residues from cutting equipment.
TIP: Storing Compost in the Kitchen
To store kitchen waste until you’re ready to transfer it to your composter, keep a container with a lid and a handle under the sink. A stainless steel compost pail with an carbon filter or a ceramic model will cut down on odors. If you don’t mind occasional smells, use an old ice-cream pail. Chop up any large chunks before you toss them in.
A Word About Yard Waste
With yard and garden wastes, different composting materials will decompose at different rates, but they will all break down eventually. If you want to speed up the composting process, chop the larger material into smaller pieces. Leaves and grass clippings are also excellent for compost but should be sprinkled into the bin with other materials, or dug in to the center of the pile and mixed. Avoid putting them on in thick layers – they will mat together and reduce aeration, which slows the composting process.
Adding garden soil to your compost will help to mask any odors, and microorganisms in the soil will accelerate the composting process.
Composting Leaves
If you have too many leaves to incorporate into the compost bin, you can simply compost the pile of leaves by itself. Locate the pile where drainage is adequate; a shaded area will help keep the pile from drying out.
The leaf pile should be at least 4′ in diameter and 3′ in height. Include a layer of dirt between each foot of leaves. The pile should be damp enough that when a sample taken from the interior is squeezed by hand, a few drops of moisture will appear. The pile should not be packed too tightly.
The pile will compost in 4 – 6 months, with the material being dark and crumbly. Leaf compost is best used as an organic soil amendment and conditioner; it is not normally used as a fertilizer because it is low in nutrients. For more information, read Use Autumn Leaves to Keep Your Compost Working Through the Winter
TIP: Leaf-Mould Tea
Use leaves to make a nutritious “tea” for your plants. Simply wrap a small pile of leaves in burlap and immerse in a garbage can or large bucket of water. Leave for three days, then remove the “tea bag” and dump contents into the compost. Scoop out the enriched water with a smaller bucket and use to water your plants and shrubs.
How to Compost
- Start your compost pile on bare earth. This allows worms and other beneficial organisms to aerate the compost and be transported to your garden beds.
- Lay twigs or straw first, a few inches deep. This aids drainage and helps aerate the pile.
- Add compost materials in layers, alternating moist and dry. Moist ingredients are food scraps, tea bags, seaweed, etc. Dry materials are straw, leaves, sawdust pellets and wood ashes. If you have wood ashes, sprinkle in thin layers, or they will clump together and be slow to break down.
- Add manure, green manure (clover, buckwheat, wheatgrass, grass clippings) or any nitrogen source. This activates the compost pile and speeds the process along.
- Keep compost moist. Water occasionally, or let rain do the job.
- Cover with anything you have – wood, plastic sheeting, carpet scraps. Covering helps retain moisture and heat, two essentials for compost. Covering also prevents the compost from being over-watered by rain. The compost should be moist, but not soaked and sodden.
- Turn. Every few weeks give the pile a quick turn with a pitchfork or shovel. This aerates the pile. Oxygen is required for the process to work, and turning “adds” oxygen. You can skip this step if you have a ready supply of coarse material like straw. Once you’ve established your compost pile, add new materials by mixing them in, rather than by adding them in layers. Mixing, or turning, the compost pile is key to aerating the composting materials and speeding the process to completion. If you want to buy a composter, rather than build your own compost pile, you may consider a buying a rotating compost tumbler which makes it easy to mix the compost regularly.

How to Choose a Composter
Choosing what type of composter will work best for you involves considering three main factors:
- Where you live
- What you’ll be composting
- Whether you want to turn your compost manually or not
| Where do you live? | What will you be composting the most? | ||
|---|---|---|---|
| Composting mostly kitchen scraps | Composting kitchen scraps plus some yard waste | Composting lots of yard waste | |
| Urban (no outdoor space) | Worm bin (vermicomposting) |
||
| Urban (some outdoor space, patio, or balcony) | Worm bins or Compost tumbler |
Compost tumbler | |
| Suburban (with yard) | Enclosed bin or compost tumbler | Enclosed bin or compost tumbler | Enclosed or DIY bin |
| Rural (with yard/acreage) | Enclosed bin, or compost tumbler | Open compost pile, enclosed bin, or tumbler | Open compost pile or multiple enclosed bins |
If you’re prepared to turn your compost every 1-2 weeks and you live in an area with access to outdoor space and carbon rich materials, enclosed bins or open compost piles could work for you. If you live in an urban environment or your back isn’t ready for all that turning, compost tumblers or a worm composter are options worth considering. Read on to learn more about each of these compost systems and other composting tips.
Simplest Composting Methods
“No-Turn” Composting
The biggest chore with composting is turning the pile from time to time. However, with ‘no-turn composting’, your compost can be aerated without turning.
The secret is to thoroughly mix in enough coarse material, like straw, when building the pile. The compost will develop as fast as if it were turned regularly, and studies show that the nitrogen level may be even higher than with turned compost.
With ‘no-turn’ composting, add new materials to the top of the pile, and harvest fresh compost from the bottom of the bin. This can be easily done in an Aerobin Composter, or a Eco King compost bin. Which brings us to…
Enclosed Compost Bins
For small-scale outdoor composting, enclosed bins are the most practical. Enclosed bins include:
-
DIY Compost Bin
The least expensive method is to build one yourself from a heavy-duty garbage can. Simply drill 1.5-cm aeration holes in rows at roughly 15-cm intervals around the can. Fill the can with a mixture of high-carbon and high-nitrogen materials (see our table above). Stir the contents occasionally to avoid anaerobic pockets and to speed up the composting process. If the lid is secure, the bin can be laid on its side and rolled; a length of 2″ cedar ( use a 2×2 or a 2×4) can be bolted to the inside, running top to bottom, to help flip the material. Without this, the contents tend to stay in place while the bin is rolled.
-
Standard Compost Bins/Digesters
Another option is a compost bin, sometimes called a ‘compost digester’. Compost bins are enclosed on the sides and top, and open on the bottom so they sit directly on the ground. These are common composting units for homes in residential areas where bins tend to be smaller, yet enclosed enough to discourage pests. These bins are inexpensive, but it is difficult to turn the compost, so it can take several months to produce compost. These bins are thin-walled plastic, and may chip along the edges, especially during a freeze.
-
Food Waste Digester
These countertop ‘composters’ grind and dehydrate food waste rather than decomposing it. The process takes as little as three hours, leaving you with an odor-free material suitable for garden fertilizer. When finished, bury the resulting material beneath the soil surface, where the decomposition process kicks in–to the benefit of your plants.
-
Tumblers
The most efficient enclosed bin method is the compost tumbler. It’s possible to maintain relatively high temperatures in drum/tumbler systems, both because the container acts as insulation and because the turning keeps the microbes aerated and active. Some designs provide an interior “paddle” or “aeration spikes” which help bring air into the compost and prevent clumping of the composting materials. Other designs have holes on the ends for aeration. This greatly speeds up the composting process.
An enclosed ‘tumbler’ system offer the following benefits:
- Speeds up the composting process
- Composts year-round due to higher internal temperature
- Can’t be accessed by rodents, raccoons, dogs, or other critters
- Keeps compost neatly enclosed and odor-free; well-suited for residential areas and large apartment terraces or patios
Tips for Successful Composting
Activate Your Compost
‘Activators’ can be added to your compost to help kick-start decomposition and speed up composting. Common compost activators include: comfrey leaves, grass clippings, young weeds, and well-rotted chicken manure. You can also buy inoculant at your local garden center, though a shovel full of finished compost from another pile works just as well.
Flying Insects Attracted to Your Compost?
Small fruit flies are naturally attracted to the compost pile. Discourage them by covering any exposed fruit or vegetable matter. Keep a small pile of grass clippings next to your compost bin, and when you add new kitchen waste to the pile, cover it with one or two inches of clippings. Adding lime or calcium will also discourage flies.
Unpleasant Odors from Your Compost Pile?
This can be a concern in urban and suburban areas with small lots and neighbors living close by. Reduce or eliminate odors by following two practices: first, remember to not put bones or meat scraps into the compost; second, cover new additions to the compost pile with dry grass clippings or similar mulch. Adding lime or calcium will also neutralize odors. If the compost smells like ammonia, add carbon-rich elements such as straw, peat moss, or dried leaves. See 7 Signs Your Compost is Struggling and What You Can Do About It.
Is Your Compost Pile Steaming?
No problem. A hot, steamy pile means that you have a large community of microscopic critters working away at making compost.
Is Your Compost Pile Soggy?
This is a common problem, especially in winter, when carbon-based materials are in short supply. To solve this problem, you’ll need to restore your compost to a healthy nitrogen-carbon balance. To learn how restore your compost pile, read our article How to Fix a Soggy Compost Pile.
Matted Leaves, Grass Clippings Clumping Together?
This is a common problem with materials thrown into the composter. The wet materials stick together and slow the aeration process. There are two simple solutions: either set these materials to the side of the composter and add them gradually with other ingredients, or break them apart with a pitchfork. Grass clippings and leaves should be mixed with rest of the composting materials for best results.

Problems with Raccoons?
If there’s a population of raccoons in your area, they will be naturally attracted to your compost pile. The best solution to this problem is to bar their entry to the compost. (Traps and poisons are more trouble than they’re worth.) A wood or metal lid can be easily hinged to the bin described above on this page, or you can buy a commercially-made compost bin with secure fitted lids which are pest-proof, such as the Aerobin or Jora JK270.
A Moveable Feast
The soil beneath a compost bin becomes enriched as nutrients filter down with successive waterings. You can place your bin on a plot of earth that you plan to use for a future vegetable or flower bed, or fruit tree. Each year, you can move the bin to a different area; you’ll get a double benefit – the compost from the bin, and a bed of nutrient-rich soil ready for new plantings.
Take Advantage of Autumn’s Bounty
The biggest challenge for small-scale backyard composting is finding enough carbon-rich materials to balance the regular input of nitrogen-rich materials from kitchen scraps, fruit and vegetable peelings, coffee grounds, grass clippings, and other fresh materials.
To learn how to make the most of autumn’s bounty, read: Autumn Composting Tips
What About People Living in Urban Locations, Can We Compost Indoors?
Even if you live in an apartment or other urban location, you can still reduce your organic waste and produce your own compost for potted plants, balcony planters, or your plot in the local community garden. There are several different methods for composting indoors which are odor-free and compact enough for even small apartments. For more information about these and other indoor composting methods, read our article: How to Compost in an Apartment
What About Weed Seeds?
A liability in composting is the unexpected introduction of new weed seeds to your garden. This is caused by slow or incomplete composting that didn’t generate enough heat to kill any and all weed seeds. Weed seeds in compost are a nuisance because once the compost is transferred to your garden beds, the compost acts to fertilize the weeds and make them even more persistent! With home compost bins or piles, the way to eliminate weed seeds is twofold:
- Make sure your compost is hot enough.
Reach your hand into the center of the pile – it should be almost too hot for comfort. Specifically, the temperature should be 130 – 150 degrees F. It takes about 30 days at 140 degrees to kill all weed seeds. - Mix your pile.
While your compost may be hot in the center of the mass, the outside of the pile is cooler, giving seeds a chance to survive. Mixing brings cooler material to the warmer area and also increases aeration, which helps attain the higher heat levels. Compost tumblers are very useful for this.
If you are buying bedding for animals, or using mulch or carbon-rich material to bulk up your compost pile, be aware of introducing seeds to your garden via the compost. For example, make sure to get straw, and not hay, since straw is mostly weed-free. Ask the sales staff if there have been any complaints about seeds in these products.
Source / Eartheasy